Clearent Hosted Payment Page
Examples
After you have looked at some examples below, be sure to head on over to our live demo page and try out your own examples!
Basic "One Line of Code" Example
At a bare minimum, you must:
- Include a link to the clearent.js script (Sandbox testing link shown below).
- Set your (Clearent-provided) MID and TID in the script url.
- Script link must have an id of "clearent-hpp". See example below.
- Set sale amount.
- Call the Clearent.payButton() method.
If you don't provide an amount, an amount field will be included in the payment popup. Generally, this would only be used when taking donations and not accepting a specific payment amount.
This code . . .
Produces a "Pay Now" button on the page (the "Pay Now" text is configurable)

That when clicked produces this popup:

Flexible Configuration
Configuration options can be grouped together when calling the payButton() method or added separately. The following are all equivalent:
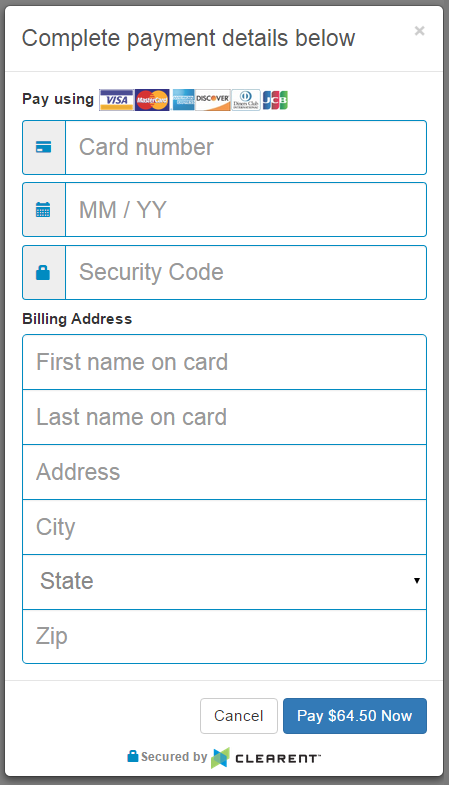
Configuring Optional Billing Address and Heading Text
As you saw in the configuration page there are many options that can be configured. Below we are adding an optional billing address and changing the heading text of the popup.
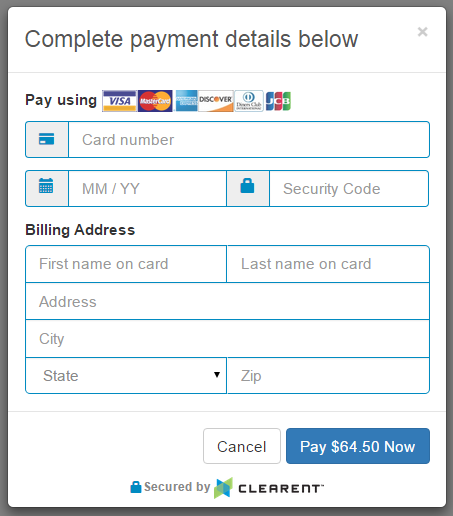
The Hosted Payment Page is responsive and designed use the screen efficiently. The same screen as above but viewed on a larger, non-mobile screen:
Using Card Tokens
Performing a sale transaction and saving card for future use.
By setting the "show-save-card-option", your customers can save their card data securely in our vault. A token is returned from the sale request that can be stored on your servers without storing sensitive card data.
Your customer would then have the option of saving their card information for future purchases.
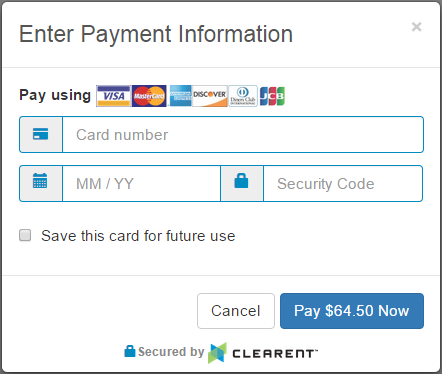
They can even save a meaningful name for their card:

Performing a token-only request.
Depending on how your site is designed, you may have a need to save a card token without doing a sale.
This code . . .
Produces an "Add payment method" button on the page (the "Add payment method" text is configurable)

That when clicked produces this popup:

Using card tokens.
The next time the customer logs into your site, you can provide saved payment methods to make the checkout process even easier. You simply provide the token, card type, and description that was returned from the token-only request or the token returned from the sale with card card option request.
The next time the customer logs into your site, you can provide saved payment methods using the Clearent.addToken() method to make the checkout process even easier. You simply provide the token, card type, and description that was returned from the token-only request or the token returned from the sale with card card option request.
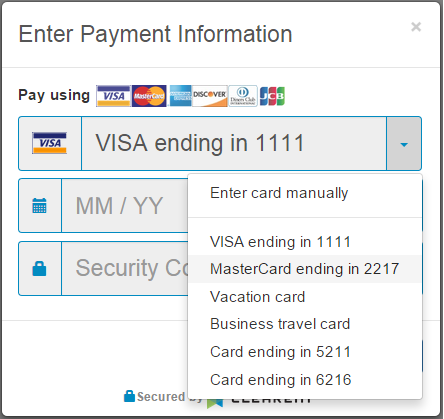
The saved cards are presented to the user in a dropdown list:
- Enter Card Manually - The user can select this card option to enter the card information manually and not use a saved card.
- [card description] - If description is provided in addToken method (see script above) the the card description is shown in the dropdown.
- [card type] ending in [last for digits of card] - If no description was provided but card type is available, the card type and last four digits of card are shown in dropdown.
- Card ending in [last for digits of card] - If no description or card type was provided, "Card ending in" last four digits of card is shown in the dropdown.
Ready to try some examples on your own? Visit our live demo page and try out your own examples!